
Are you excited about getting your HP printer up and running with your computer? Well, who wouldn’t be? In this comprehensive guide, we’ll take you on an exciting journey of connecting your HP printer to your computer, no matter your tech-savviness level. We promise you’ll find it easier than a child’s play! So, let’s dive right in and explore the magical world of hassle-free printing.
How to connect HP printer to computer
In the realm of modern technology, connecting your HP printer to your computer has never been easier. Embrace the harmonious blend of innovation and user-friendliness as we guide you through this hassle-free process. With our expertise, you will achieve seamless connectivity in no time.
More information: Why HP Printer Is In An Error State Easy Solution to Fix
Step 1: Unpack and connect cables
The first task is to unpack the printer, choose a suitable location for it, and connect the cables. While there are usually no problems with the power cord, because it is standard, it is difficult for inexperienced users to establish a connection between the printing equipment and the computer. To do this you need a cable, which is also included.
One side has an unusual USB type B connector, which you can see in the following picture. You insert this side into the port on the printer itself. Usually there is a recessed port on the back or side, so you will have to look around on the outside of the printer to find it.
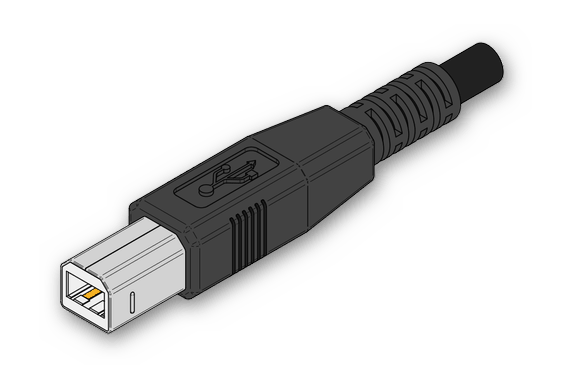
The first side of the cable to connect the HP printer to a computer or laptop
Next comes the second side of the cable with a standard USB connector. Insert it into any corresponding port on the laptop, and after turning on the printer by pressing a button in the operating system should appear a notification that a new device is detected.
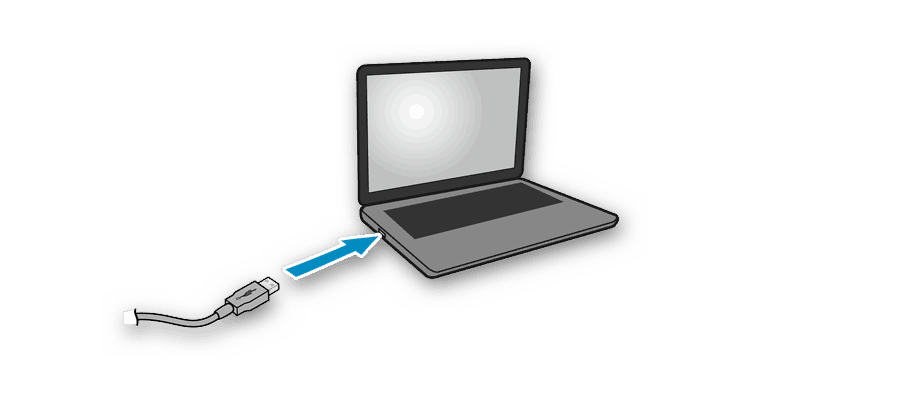
The second side of the cable to connect the HP printer to your computer or laptop
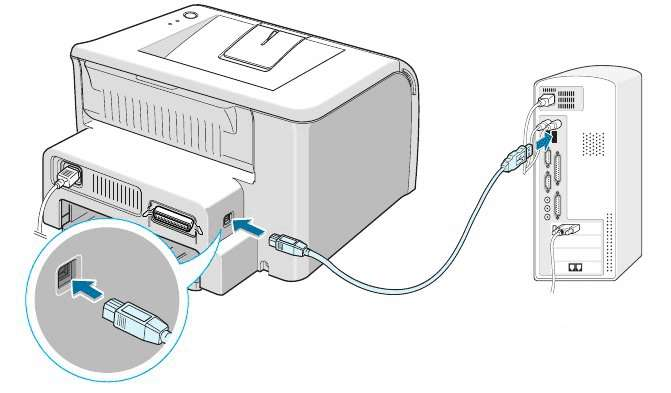
Note that when using personal computers, preference should be given to the USB port that is on the motherboard, that is, located on the back of the case. If you Connect HP Printer to the front, in most cases there are no problems, but sometimes the signal is not provided, which is due to a lack of power to such a connector.
Connecting the HP printer to your computer via the connector on the motherboard
Step 2: Installing HP Printer Drivers
Now that your printer is physically connected, it’s time to ensure your computer understands it too. Follow these steps to install the necessary printer drivers:
- If your computer is running Windows, simply insert the installation CD or visit the official HP website to download the latest drivers.
- For Mac users, the drivers should install automatically, but you can also download them from the website if needed.
- Follow the on-screen instructions, and you’ll have the drivers ready in no time!
- Open Start and go to Settings.
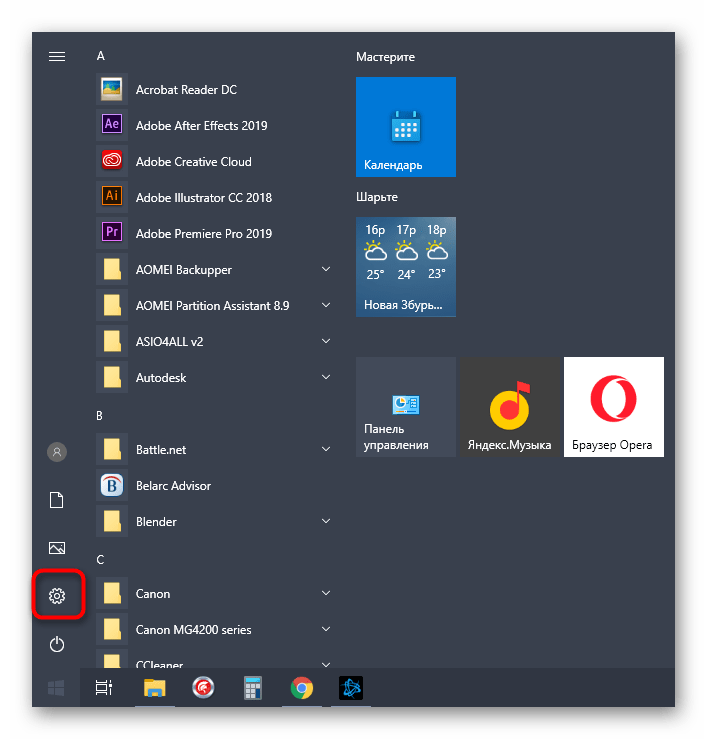
- Click the tile named “Devices” to go to this menu.
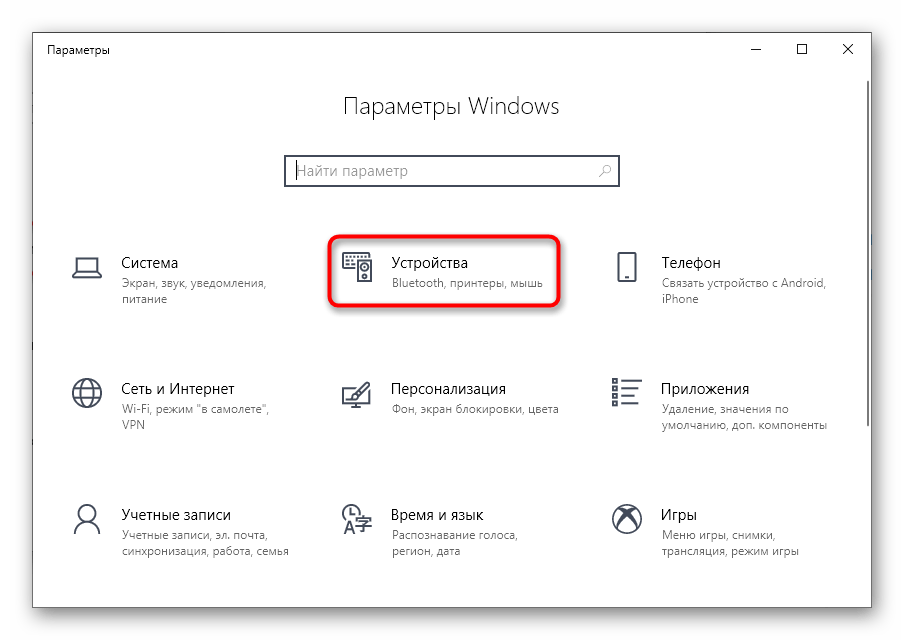
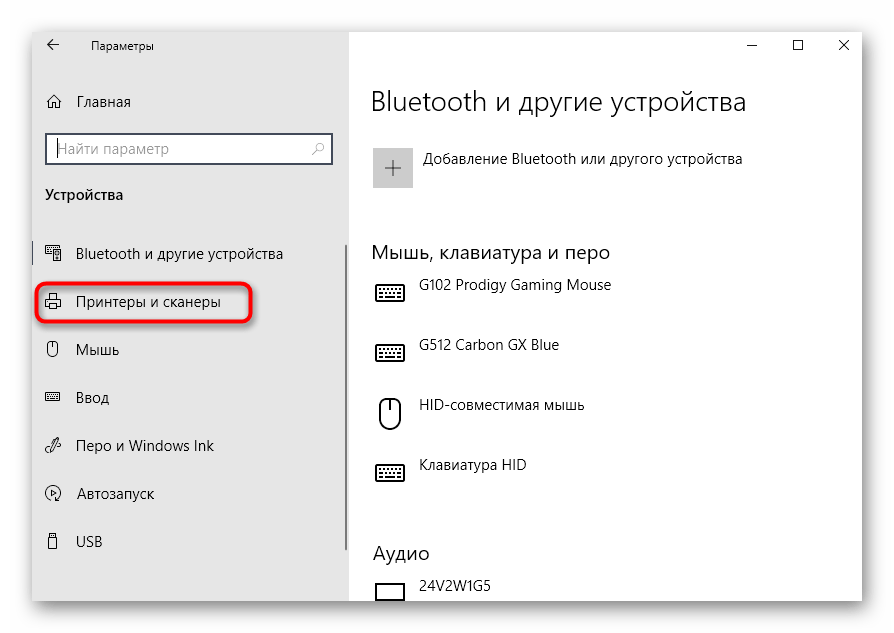
- In the panel on the left you are interested in the “Printers and Scanners” category.
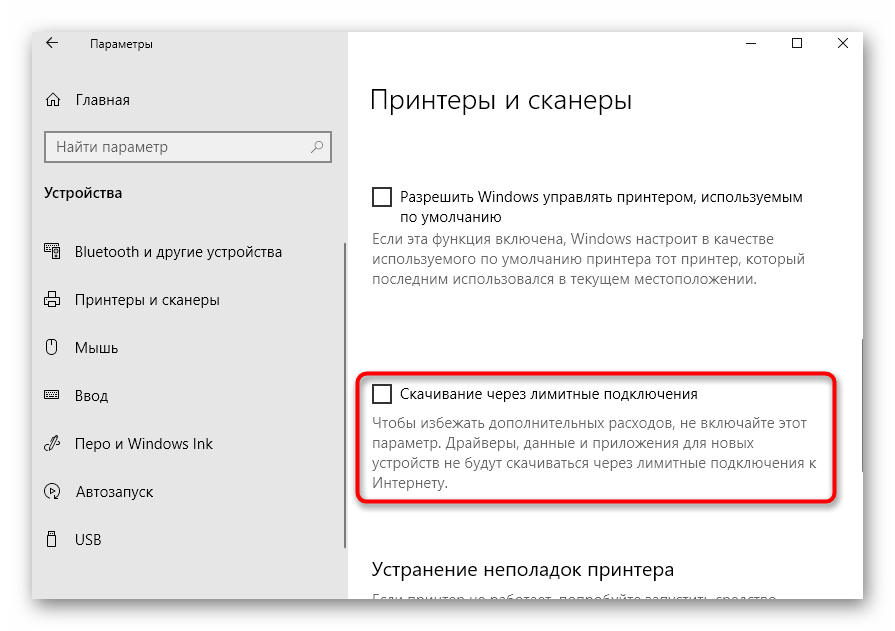
- Among the settings in this window, check the “Download via limit connections” option.
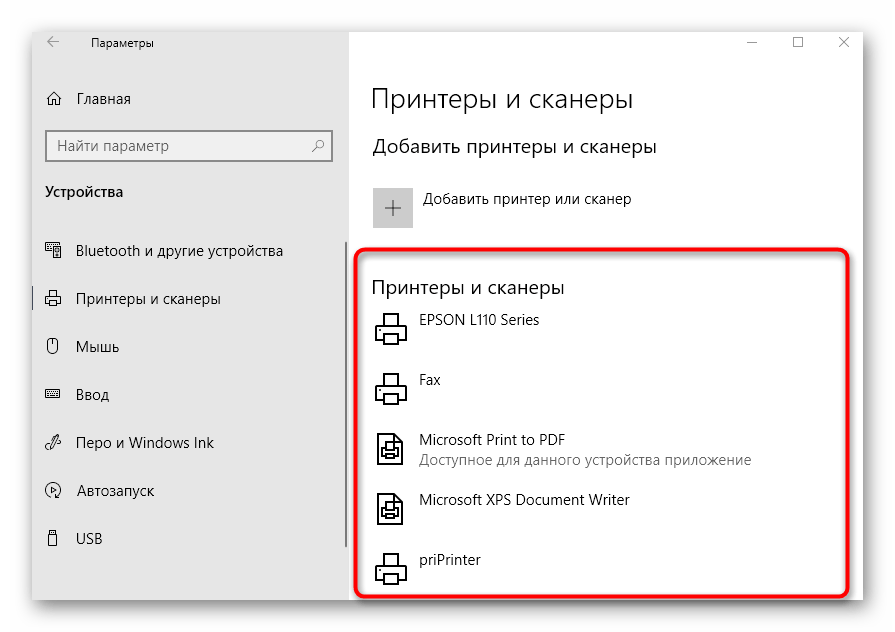
- Once the drivers for the HP printer are installed, it will appear in the device list in the same menu and you can proceed to start test printing.
Not always driver downloading starts immediately after activating the option to download via a limited connection. Often, you’ll either have to reconnect the printer. Preferably by selecting a different USB connector, or sending the computer to reboot. So even the loading of the drivers does not happen. You will need to use alternative options to download the software. This can be an official site or a third-party application. As you can read in the universal instructions below. Or you can find an article on a specific HP printer model by searching our website.
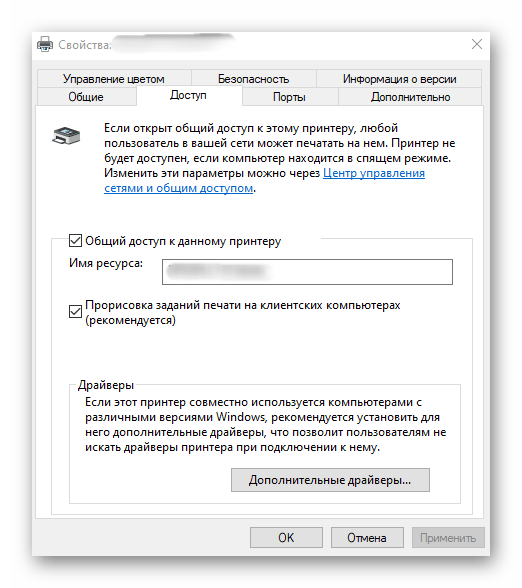
Step 3: Setting up the device for networking
When planning to use multiple PCs or laptops to print on an HP printer, it is best to share and enable printing within the local network right away. To do this, you can use a separate guide on our HP printer error website by clicking on the following link.
In addition to setting up sharing on other computers, you need to set up a network connection. To do this, a local network must be set up, and the device itself must already be on it. The other steps are time-efficient and extremely simple. Take a look at them in our other article.
Step 4: Setting up the printer
A printer is not always immediately ready to print, especially when it comes to non-standard paper sizes or the products themselves. Then you have to turn to the printer settings in the operating system or use an application from the developers. We have a comprehensive guide on this topic that will answer all of your questions.
Conclusion
Congratulations! You have now mastered the art of Connect HP Printer to your computer with ease. Embrace the synergy of technology and simplicity as you embark on your printing journey.Enjoy hassle-free printing, and let the symphony of innovation and user-friendliness fill your digital world.
More Information: HP Printer Error Codes and How to Fix It
Summary:
In this comprehensive guide, we explored the seamless process of Connect HP Printer to your computer. From understanding various connectivity options to Troubleshooting HP Printer Offline common issues, we ensured that your printing experience is nothing short of exceptional. Embrace the power of technology and simplicity as you embark on your printing journey. If the above step fails to connect your HP printer to the computer. you can also visit our printererorus.com technical support.